



Testing and analyzing the physical components of a device at a software level helps to identify and resolve any issues. This article discusses various methods to run hardware diagnostics on Windows 10 and keep your devices in top shape.
What is hardware diagnostics?
Hardware diagnostics is the process of testing and evaluating the various hardware components of a computer system to determine if they are functioning properly. These components include the RAM, hard drive, processor, motherboard, and other internal or external devices.
According to an Arcserve survey, hard drive malfunction (80.9%) is the leading cause of HDD failure.
How does hardware diagnostics help?
Here are the benefits of running hardware diagnostics on a Windows PC:
- Identify potential issues: Hardware diagnostics enables the detection of any possible issues that may arise with your computer’s components, including the RAM, hard drive, or processor. By identifying these issues early on, you can promptly prevent them from escalating into bigger problems that could result in data loss or system failure.
- Improve performance: If your computer is running slowly or experiencing other performance issues, running hardware diagnostics can help identify the root cause of the problem. Once you know what’s causing the issue, you can take steps to fix it and speed up your PC.
- Save time and money: By identifying and addressing hardware issues early on, you can save time and money in the long run. Fixing a small issue now may be much less costly than waiting until it becomes a major problem that requires professional assistance.
Signs Your Hardware May Be Failing


1. Use Device Performance & Health Tools
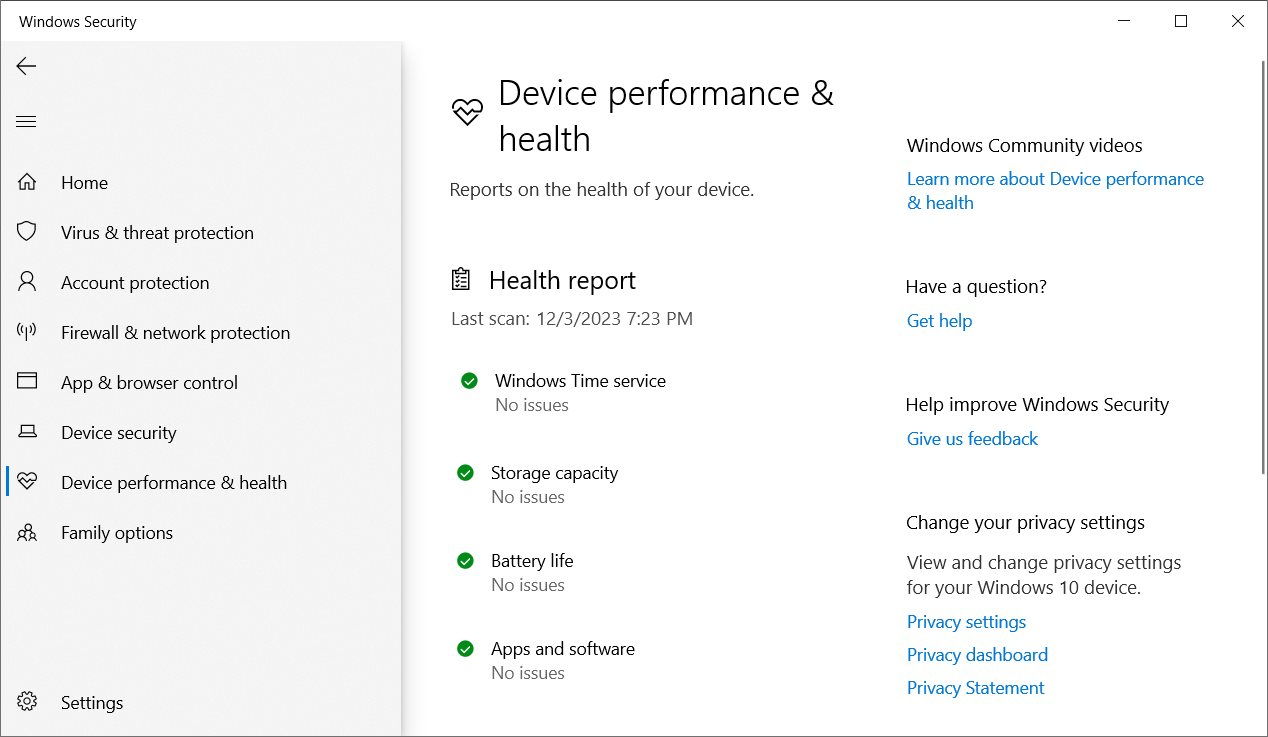

The Windows 10 built-in security suite has a Device Performance & Health section that allows you to check the device’s overall health. It shows the last time a Device Health scan was run and the status of key areas. The Device Performance & Health utility provides insights into various aspects, such as battery life, storage capacity, and device security, offering recommendations to fix any related issues. For example, if the battery life is low, it may suggest ways to optimize power usage or replace the battery.
To reach the Device Performance & Health area of Windows 10:
- Open the Start menu.
- Find and open Window Security.
- Go to Device Performance & Health.
The following are possible problems and solutions suggested by the Windows 10 Device Performance & Health tool:
- Your Windows Time service is disabled or faulty: Restart or repair the Windows Time service to automatically set your PC clock to an internet-based time service.
- Your system is running low on disk space: Remove large and unnecessary files from the operating system drive to free up disk space and declutter your PC.
- Something is straining your battery life (for unplugged devices only): There are various ways to fix battery life issues, such as adjusting power settings, reducing screen brightness, and using battery-saving features in browsers.
- Some of your software is outdated or faulty: Keep your software updated to the latest version and reinstall applications if necessary.
2. Use Device Manager
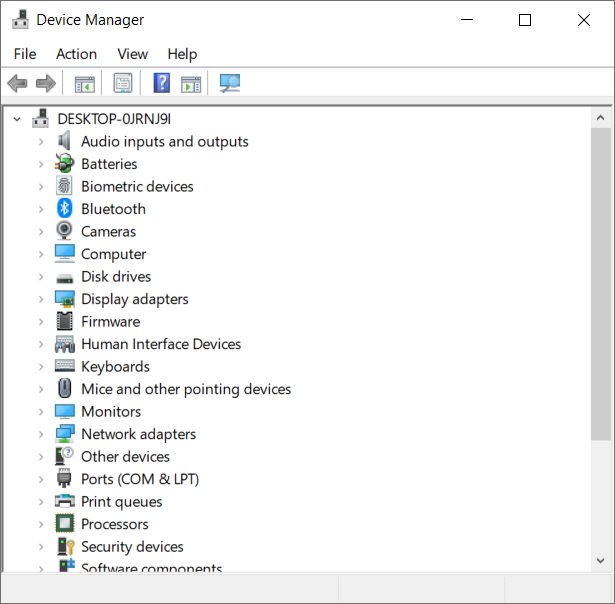

Device Manager allows you to view and manage all of the hardware devices installed on your computer. This tool is useful for troubleshooting issues with specific devices and updating drivers.
Follow these steps to run Device Manager in Windows 10:
- Press Windows key + X and select Device Manager from the menu.
- In Device Manager, locate the device you want to diagnose and double-click on it to open its Properties window. Problematic devices are indicated by a yellow mark.
- Check device information in the General tab > Device status. For additional information, switch to the Events tab and click View all events.

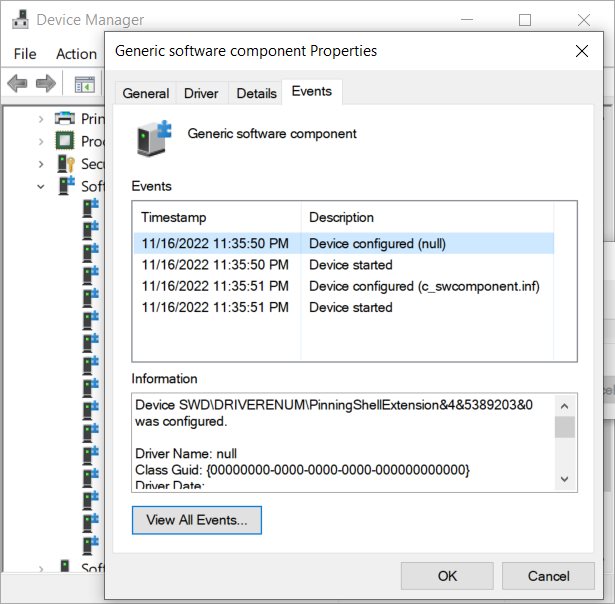
Most device problems can be resolved by updating drivers.
3. Use Hardware and Devices Troubleshooter
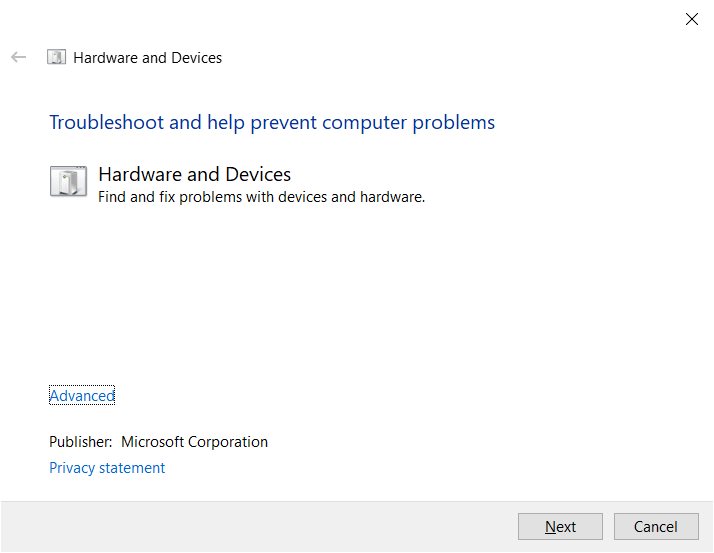

The Hardware and Devices Troubleshooter is a built-in tool in Windows that helps diagnose and fix issues related to hardware devices connected to your computer. This utility scans for problems with printers, cameras, and other peripherals, attempting to automatically resolve any detected issues. It doesn’t need manual troubleshooting or advanced technical knowledge.
Follow these steps to run Hardware and Devices Troubleshooter on Windows 10:
- Go to Settings > Update & Security > Troubleshoot > Additional troubleshooters and select Hardware and Devices Troubleshooter.
- If the troubleshooter is not visible, press Windows + R and enter the following command:
msdt.exe -id DeviceDiagnostic
- If the troubleshooter is not visible, press Windows + R and enter the following command:
- Follow the prompts to fix hardware issues.
- Restart the computer and check if the problems are resolved.
4. Run System File Checker
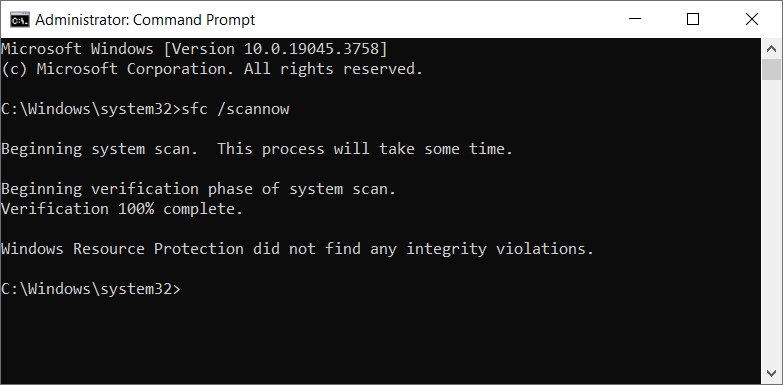

The System File Checker (SFC) scan can detect and repair corrupted Windows system files, which might indirectly resolve some hardware issues. To use this tool, open Command Prompt as an administrator and type sfc /scannow to run a scan.
Once the scan is complete, the tool will provide one of the following messages:
- No Integrity Violations: Indicates that no corrupt files were found.
- Found Corrupt Files and Repaired Them: SFC found and fixed the issues.
- Found Corrupt Files but Was Unable to Fix Some (or All) of Them: In this case, you might need to perform further actions, like running DISM (Deployment Image Servicing and Management) or manually replacing files.
If issues were fixed, restart your computer and check if the problem is resolved. Otherwise, try running the DISM tool with the command DISM /Online /Cleanup-Image /RestoreHealth. This command can fetch fresh copies of damaged files from Windows Update.
5. Use Windows Memory Diagnostics


The Windows Memory Diagnostic is a tool built into Windows 10 that helps diagnose and identify problems with your computer’s memory. It determines if faulty RAM modules cause crashes or system instability. Running Windows Memory Diagnostic is easy. But you need expert knowledge to interpret the details if it finds errors.
Follow these steps to run Windows Memory Diagnostic on Windows 10:
- Save any ongoing work and close all applications.
- Open the Start menu and search for Windows Memory Diagnostic.
- If the tool doesn’t show up in the search results, press Windows + R and enter the following command:
mdsched.exe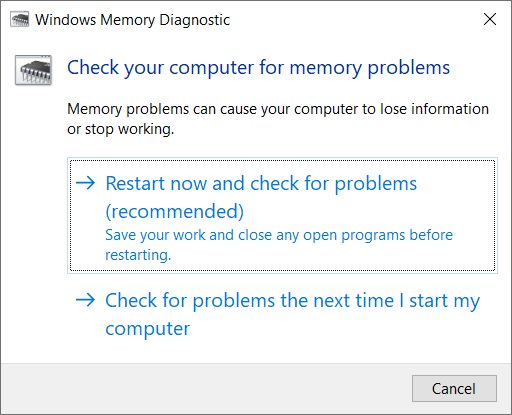
- If the tool doesn’t show up in the search results, press Windows + R and enter the following command:
- Select Restart now and check for problems.
- Windows Memory Diagnostic will run before the operating system boots. It may take a few hours.
- After Windows 10 starts up, open the Start menu to find and open Event Viewer.
- Go to Windows Logs > System.
- Click the Date and Time column until it shows the newest logs first.
- Select the first entry that says MemoryDiagnostics in the Source column.

- Double-click the entry for more information and copy the displayed information to share with a PC specialist.


6. Create a System Diagnostics report
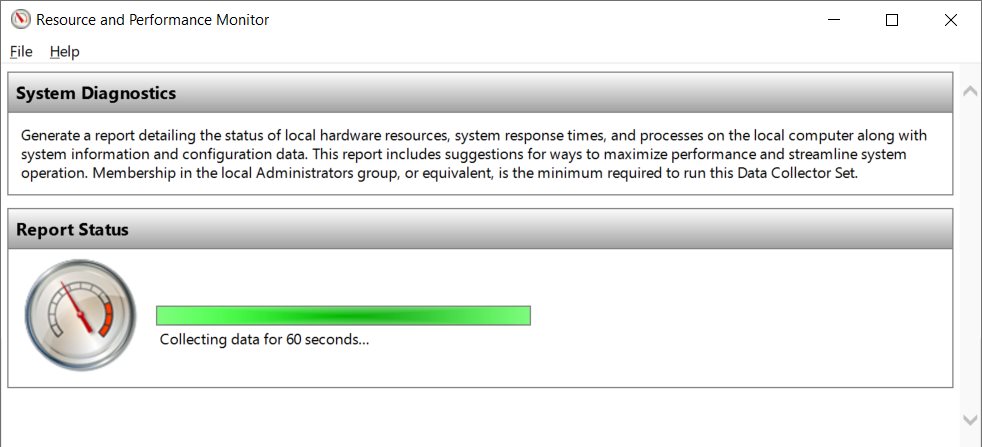

System Diagnostics is a native Windows tool that provides a comprehensive overview of the local computer’s hardware resources, system response times, and processes. It includes information about the system’s configuration data and performance suggestions to optimize its operation.
To create a System Diagnostics report, press Windows + R and enter perfmon /report.
7. Run BIOS diagnostics
Some Windows 10 computers have built-in diagnostics tools accessible through the BIOS (Basic Input/Output System). Follow these steps to run BIOS diagnostics on your PC:
- Restart your computer and press the key to enter BIOS setup (usually F2, F10, or Delete).
- Navigate to the Diagnostics tab using the arrow keys.
- Select the type of diagnostic you want to run, such as a memory or hard drive test.
- Press Enter to start the test.
- Wait for the test to complete and note any error codes or messages that appear.
- Start Windows 10 as usual and look up the error codes or messages online for solutions or talk to an expert.
8. Use third-party diagnostic tools
External diagnostic tools can help you check hardware components like hard drives, CPUs, and graphics cards for potential problems. Popular options include HWiNFO, PC Doctor Toolbox, and Speccy. By using third-party diagnostic tools to run hardware diagnostics on Windows 10, you can proactively monitor and maintain the health of your computer’s hardware components, which can help prevent potential failures and ensure optimal performance over time.
Follow these general guidelines to use third-party tools for diagnosing hardware problems on Windows 10:
- Research and select a reliable third-party diagnostic tool that is compatible with your version of Windows 10.
- Download and install the diagnostic tool on your computer.
- Launch the diagnostic tool and select the type of hardware you want to test (e.g., CPU, RAM, hard drive).
- Follow the instructions provided by the diagnostic tool to run the hardware test.
- Once the test is complete, review the results to identify any issues with your hardware.
- If any issues are found, consult a professional technician or refer to online resources for resolution.
- If no issues are found, rest assured that your hardware is functioning properly.
Conclusion
To recap, running hardware diagnostics on your Windows 10 computer is crucial to identifying and resolving any issues affecting its performance. With the native utilities provided by Windows, such as Device Manager and Windows Memory Diagnostics, as well as third-party diagnostic software, you can easily diagnose and fix any hardware-related problems. Regularly performing these diagnostics can keep your computer running smoothly and avoid more serious issues down the line.