



Windows Memory Diagnostic (WMD) is a powerful tool for catching and identifying RAM issues on Windows, offering an intuitive starting point for hardware diagnostics and system stability. Problems with RAM can lead to crashes, data corruption, and performance degradation, so it’s crucial to address any issues promptly. Here’s a comprehensive guide on using WMD and troubleshooting memory-related problems.
System requirements and compatibility
Windows Memory Diagnostic is compatible with all Windows versions from Windows Vista onwards. It works seamlessly with modern and legacy hardware architectures, meaning it supports both x86 (32-bit) and x64 (64-bit) systems. It can be accessed directly from Windows itself or by creating a bootable CD/DVD or USB drive.
How to use Windows Memory Diagnostic

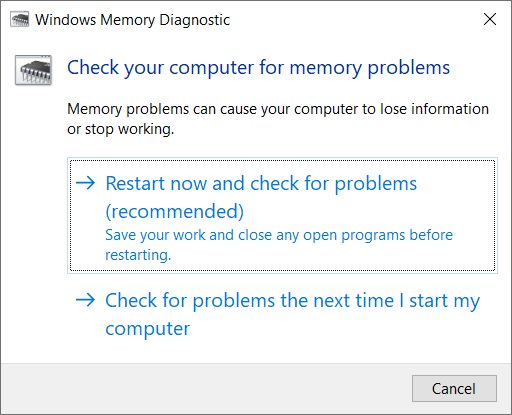
- Open the Start menu and type
Windows Memory Diagnostic. Alternatively, press Win + R, typemdsched.exe, and press Enter. - Choose Restart now and check for problems. Your system will reboot, and the diagnostic tool will start testing.
- Press F1 to adjust settings. Select between Basic, Standard, or Extended tests depending on how thorough you want the checks to be.
- Once the test concludes, Windows will restart, and a notification with the results will appear in the Action Center.
Interpreting results

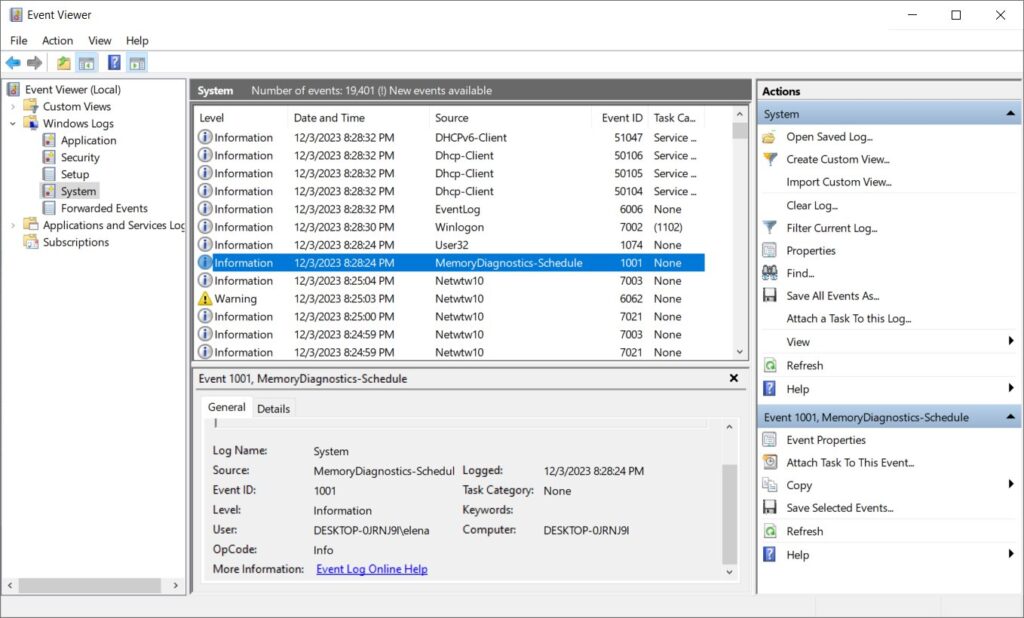
After the system restarts, a notification will display if errors are found. If there is no automatic report, check the Event Viewer by:
- Opening the Event Viewer (Win + R, type
eventvwr.msc). - Navigating to Windows Logs > System.
- Searching for
MemoryDiagnostics-Results.
Look for messages indicating whether errors were detected. Typical messages are:
No errors were detected.Hardware problems were detected, followed by details or addresses where the errors occurred.
Understanding “Hardware problems were detected” error messages
After identifying hardware problems, Windows Memory Diagnostic usually provides more specific information:
- Memory addresses: The addresses point to specific memory locations where errors have been detected. Each address represents a numerical location in RAM where the problematic read/write occurred, helping identify which part of the memory module is faulty. These addresses can sometimes reveal patterns, such as errors only occurring in a specific memory range, indicating a particular module or slot with issues.
- Error types:
- Parity errors: Errors that occur when stored data doesn’t match its error-checking code.
- ECC errors: Detected in systems with ECC (Error-Correcting Code) RAM, indicating that data corruption was detected and possibly corrected.
- Read/write errors: Indicate problems during the process of reading data from or writing data to memory.
- Error count: The diagnostic report may include the total number of errors detected, giving a sense of the severity or frequency of the problem. Multiple errors across different memory addresses might suggest that the entire module is faulty, while errors limited to a single address range could be due to a specific section.
Examples
- General error message:
Hardware problems were detected during the memory diagnostic test. Contact your computer manufacturer for assistance in repairing this issue. - Detailed error message:
Hardware problems were detected. Memory error detected at address 0x00007FFFFF123456. This issue may cause system instability and application errors. - Specific error message:
Hardware problems were detected. Parity error found during memory read operation at address 0x000000001234ABCD. Please consider replacing the faulty memory module.
How to fix a Windows Memory Diagnostic error
For example, if you encounter a memory error at a specific address like 0x00007FFFFF123456, here’s a step-by-step guide to help you troubleshoot and resolve the issue:
- Document the error: Note down the full address where the error was detected, as provided by the diagnostic tool. This will be important for tracking and verification later on.
- Test individual RAM modules:
- Remove all RAM sticks except one.
- Power on the computer and rerun Windows Memory Diagnostics.
- Repeat this process for each RAM stick individually, making sure each time to note whether the error reappears and at which address.
- Identify the faulty module:
- If the error address 0x00007FFFFF123456 reappears while a particular RAM stick is installed, you’ve likely found the faulty module.
- If the error does not reappear with individual modules but does with multiple, consider the possibility of a motherboard slot issue or compatibility issue between the modules.
- Replace the faulty RAM: If a specific module is consistently showing errors, replace it with a new one that matches your system’s specifications.
- Check motherboard slots: If errors occur in different patterns with different modules, test each module in different slots to check if a particular slot might be causing the problem.
- Run the diagnostic again: After replacing or repositioning the RAM, run the diagnostic tool again to ensure no errors are reported.
- Monitor system stability: Continue to monitor the system for any signs of instability or recurring errors.